Featured Post

We've moved to tex.my!

It’s been great writing on Blogger.com, but we’ve decided to move to a new platform, thanks to some valuable help from a great, great friend...

Saturday, July 16, 2011

Printing Beamer Slides

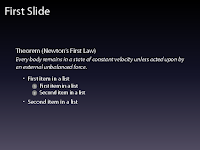
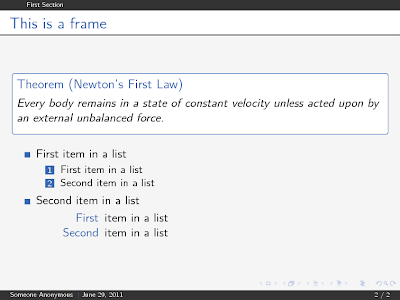
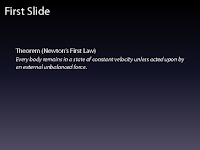
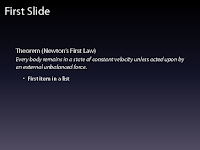
Every now and then I’d go wild with \pause and \item<+-> in my Beamer presentations, to present information piecewise. (I’m aware that some people disapproves this.) (By the way, the Manhattan theme is a Keynote lookalike.)

\documentclass{beamer}
\usetheme{Manhattan}

\begin{document}
\begin{frame}
\frametitle{First Slide}

\begin{theorem}[Newton's First Law]
Every body remains in a state of constant velocity unless acted upon by an external unbalanced force.
\end{theorem}
\pause
\begin{itemize}
\item<+-> First item in a list
\begin{enumerate}
\item<+-> First item in a list
\item<+-> Second item in a list
\end{enumerate}
\item<+-> Second item in a list
\end{itemize}
\end{frame}
...
\end{document}
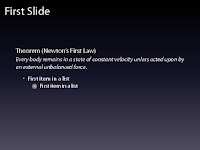
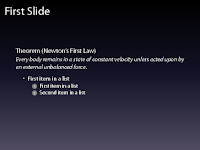
For archival and distribution purposes, I usually invoke

\documentclass[trans]{beamer}

to get a PDF file in which all the overlays are “condensed” to their respective single slides.
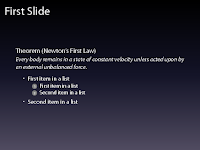


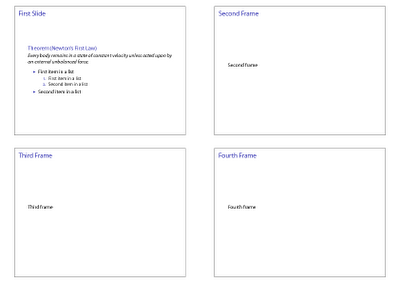
When it comes to printing the slides for my own reference, though, I often prefer to have the presentations 4-up on an A4 sheet. In addition, the Manhattan themed presentation isn’t really printer-friendly. So I’d instruct Beamer to only use the Manhattan theme in beamer and trans modes; and that it should use some mostly-white theme as well, as placing the slides 4-up on an A4 paper in handout mode (code lifted from the Beamer manual).

\documentclass{beamer}
% \documentclass[handout]{beamer}
% \documentclass[trans]{beamer}


\mode<beamer|trans>{
\usetheme{Manhattan}
}

\mode<handout>{
\usetheme{default}
\usepackage{pgfpages,pgf}
\pgfpagesuselayout{4 on 1}[a4paper, landscape, border shrink=5mm]
\pgfpageslogicalpageoptions{1}{border code=\pgfstroke}
\pgfpageslogicalpageoptions{2}{border code=\pgfstroke}
\pgfpageslogicalpageoptions{3}{border code=\pgfstroke}
\pgfpageslogicalpageoptions{4}{border code=\pgfstroke}
}
...

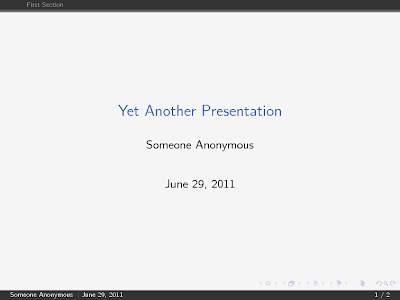
Running pdflatex while activating the handout mode then gives me this output:


Just remember to process your file twice every time you change the mode, so that all hyperlinks and bookmarks are updated properly.

Tuesday, July 12, 2011

DIA + Lyx

Before I discover DIA, I used Microsoft Visio for schematic drawing to be included into my documents. The schematic drawn has to be exported into a graphic file, in which I prefer .png format. Then only it can be included in .tex document as a graphic.

Then I found DIA. You can search the web for more info on the software itself. In short, it is an open source software Lyx as well. What I found to be helpful is that, DIA has an extension to convert .dia files, where you save the schematic drawing, into graphic files in the format of .png which can be called directly by Lyx.

What I have to do is, draw whatever schematic that I want, save it in .dia format. Then in Lyx, insert the graphic as usual. At the graphic file name field, insert the .dia file name. Lyx will treat that as the graphic file where you can resize etc. similar to any graphic files included using the method. 

Another setting to be done is that to let Lyx know where to fine the DIA extension to convert .dia file to .png file so that Lyx can call it upon generating final document. The setting can be found under menu Tools > Preferences and under File Handling > Converters tab. Under From format pulldown menu, search for DIA and under To format pulldown menu, search for PNG. In Converter field, insert this
dia -e $$o -t png $$i
and click Add button. That is it. Now you can use .dia file directly to include graphic into you document. Happy trying. See you soon.

Sunday, July 10, 2011

Unexplained error

I faced this kind of error before. What I mean by unexplained is that the location of error shown by Lyx does not contain any error. Sometime it is just one word without any LaTeX command at the location. By the way, I should mention for the benefit of newcomer, Lyx will highlight the supposedly error location. In this case of error, the highlight is at random location and you can explain what is the actual error. The unexplained error usually occurs, at least I experienced it, once I include a citation. I use BibTeX to generate reference list. The .bib file is linked to the Lyx file and once a citation is included, BibTeX will run the process of creating the list. Error will occur if the bib database contains error, usually it has an illegal character. You know, citation info can be exported directly from publisher's webpage or even from Google Scholar page. The auto export function is the culprit of the error. Some of the article title or even the name of authors can have illegal characters. Most of it is characters like % and &, which is the command character in LaTeX. So, the errors can be overcomed by making sure that the bib database doesn't have any of this illegal characters. That will it for now. See you soon!
Published with Blogger-droid v1.7.2

Saturday, July 2, 2011

Getting started with Lyx

Well, to get started with Lyx is pretty straight forward. Of course you have to install the software, which you can download from lyx.org. The installation is again, straight forward. No much hassle. Just say yes to all the question. Unless you want to tweak some features.
Basically it is just like using word processor (Microsoft of OpenOffice or LibreOffice). Create a new file, then you are almost ready to go. If you are using source code editor, first command you put in is
\documentclass[]{}
Well, you have to do the same with Lyx. The function can be found in menu Document > Settings. Here basically you can do all the setting necessary. You can select the class file from dropdown menu under Document Class tab. By default, there are few classes already installed in Lyx. That includes article, IEEEtran, elsarticle, beamer (if I not mistaken), book etc. If the class is not installed, it will be marked as Unavailable.
To make a class available in Lyx dropdown menu, you have to create the layout file. It will link the class to the ui of Lyx so that it can be shown. Creating a layout file is very easy. Here is the most basic layout file that can work with any class file.
#% Do not delete the line below; configure depends on this
# \DeclareLaTeXClass[classfilename]{name-to-appear-in-dropdown-menu}
input stdclass.inc
With that the class file can already work provided that it is saved with the same file name as the class file name, i.e. the class file is myclass.cls, therefore the layout file should be named, myclass.layout. As simple as that.
To include the layout in the dropdown list, you have to save the layout file in layouts folder in Lyx program folder and reconfigure Lyx through menu Tools > Reconfigure and close and reopen Lyx afterwards. Or, if you don't want it listed, you can just use local layout option (there is a local layout button next to the dropdown menu). However, using this option, you must have the layout file in the same folder as your document file.
If you have zero knowledge of LaTeX, don't worry. Once you have selected the document class, you can start entering document content. On top left corner, just below File menu, there is a dropdown menu with option Standard as default. This is called style picker. Standard is for normal text. Here you can select title, author, section, chapter, section*, theorem etc. depending on what is available in class and defined in layout. To change you text into certain style, you don't have to select text, just simply put the cursor anywhere in the text line, and change the style. Now you can start typing the content.
I think that should be it for now. Next time, we will see how to add more than text in Lyx. Until then, happy LaTeXing.

Thursday, June 30, 2011

Wuerzburg Beamer Theme

I’ve received a few enquiries about the Beamer theme of my MOSC2011 slides. This beautiful, subtle theme is wuerzburg (scroll down to “LaTeX Beamer Themes”), created by Christian Gogolin.

Basic usage and the output:

\useoutertheme{wuerzburg}
\useinnertheme[outline]{chamfered}
\usecolortheme{shark}


Depending on your mood, you might want to go for a more ‘polished’ feel:

\useoutertheme[glossy]{wuerzburg}
\useinnertheme[outline,shadow]{chamfered}
\usecolortheme{shark}


See the comments in the .sty files for more options.

Saturday, June 25, 2011

WYSIWYM editor

LaTeX users would know that there are two types of editor, source code type and WYSIWYM type.

But first, thank you to Najmi and Lian Tze for inviting me to share something here. It is a great honor to do so. Knowledge kept to oneself has no price but knowledge shared is priceless.

I guess Najmi and Lian Tze can cover the source code editor type since they are way more experienced than me. I started using and learning to use it on a WYSIWYM editor. Lyx to be specific. You can check www.lyx.org or wiki.lyx.org for info on the software itself. With it I started to discover a lot of magnificent thing and I fall in love with LaTeX.

However, now I use less Lyx because I feel it limits my creativity to customize the output document. But nevertheless, I still think that Lyx can provide a soft and smooth transition from other WYSIWYG type word processor.

As like many other open source software, Lyx can be installed on machine running Windows, Linux and MacOS. They have just launch a 2.x.x version in May to mark their 15 years of existence.

In Lyx, apart from class and style files, there are one more file type native to it only called layout file. This file controls the look of your document on the Lyx interface. If you type a chapter heading, you want to to appear center align, bold and blue in color, you control it with layout file. But bear in mind that, what appears on Lyx interface is not necessarily what appeared in the final output document. Because layout and class file are different in nature, although must be same in filename.

Lyx come with some pretty standard group of layout files for some popular class files like IEEETran, Elsarticle, beamer etc. But if you create your own class file, you might want to create you own layout file so that it can be included in Lyx. Without layout file, you can't call the class file.

That is all for now. Next time, how to start using Lyx with zero knowledge of LaTeX. Stay tune!

Thursday, June 23, 2011

Book Review: LaTeX Beginner’s Guide

(Thanks to Packt for the complimentary eBook copy for this review.)


When I read about the publication of the book on various forums and blogs, my interest was definitely piqued: the author, Stefan Kottwitz, is a frequent and helpful contributor/moderator on TEX.SX. On the other hand I wondered if anyone would actually want to buy an introductory book to LaTeX, considering the many free tutorials and eBooks available on the Web (although there are many out-of-date ones, so beware! See some recommended ones at the end of this post).

After a quick flip — erm, clicks with the mouse — through my complimentary eBook copy courtesy of Packt, I felt the answer was a very firm “YES”. First off, this is certainly an up-to-date book with descriptions of recent packages, and warnings about obsolete ones. While the first few chapter headings read like most other beginner’s guide to LaTeX, Kottwitz’s approach of using complete step-by-step examples throughout the book is something seldom seen in other books or tutorials. By that I mean you don’t just get the first few handful of “Hello World” examples, but for much more advanced usage scenarios as well. (BTW, The examples are based on TeXLive and TeXworks.)

Your mileage may vary, but I do feel that such a hand-holding approach (that’s what my training course had been described as) — at least in the early days of learning LaTeX — is very reassuring. Especially so since LaTeX can be rather intimidating for people who have only used WYSIWYG word processors before. Pop quizzes are interspersed throughout the content (answers in the appendix).

The book has 13 chapters on the following topics:
  1. Getting Started with LaTeX
  2. Formatting Words, Lines, and Paragraphs
  3. Designing Pages
  4. Creating Lists
  5. Creating Tables and Inserting Pictures
  6. Cross-Referencing
  7. Listing Content and References
  8. Typing Math Formulas
  9. Using Fonts
  10. Developing Large Documents
  11. Enhancing Your Documents Further
  12. Troubleshooting
  13. Using Online Resources

While the early chapter headings are kind of expected of any beginner’s guides, they do still contain valuable nuggets. For example, the microtype package is introduced in Chapter 2, as is how to define your own macros with \newcommand. Imagine a beginner’s joy at the even more beautiful typesetting afforded by microtype. And the new-found freedom of defining one’s own commands for consistent typesetting of certain materials. Personally I think such tips, introduced at an early stage, would boost beginner’s confidence in using LaTeX.

While some might consider the installation instructions of TeXLive and TeXworks in Chapter 1 as frivolous, I certainly welcome the instructions on how to install extra packages in Chapter 11.

Chapter 3 on designing pages is particularly useful, as this seems to be one of the most frequently asked beginner’s questions these days. (at least, indicated by the fact that the post on setting page sizes and margins being the 5th all-time most favorite post on this blog.)

I also like the mention of getnonfreefonts in the chapter on fonts. Another favorite chapter of mine is that on Troubleshooting, as this is definitely one of the most important skills if one is to use (and learn!) LaTeX. And everyone who’s going to write a thesis or a business report will definitely want to read Chapter 10 on large documents.

Overall, the book does cover everything a beginner should learn about LaTeX, IMHO anyway. My only nitpicks are that the LaTeX logo isn’t typeset ‘properly’ in the text; and that the LaTeXed output images seem a tad blurry in the PDF eBook version. But these are just petty nitpicks, really.

So do I recommend LaTeX Beginner’s Guide for people interested in learning LaTeX? I’d say Yes. This would be a very nice addition to libraries, or as a communal copy in a research lab, so that newly registered graduate students who’re not yet quite busy with their research can spend their first month learning up LaTeX with it. (You can, of course, get your very own copy; I only mention a communal copy as I know some Malaysians — especially poor grad students — might be reluctant to fork out about RM120 for a book. Everyone really should fork out money to buy a good book sometime, though.)

The book is available as a printed copy (£25.19), eBook copy (£16.14), or multi-format (£28.04). Shipping is free if you’re in UK, US, Europe, Brunei, Hong Kong, Indonesia, Japan, Malaysia, Philippines, Korea, Singapore, Thailand, China, Macau and Taiwan — sweet!

Further Reading

Having said all that, you’ll probably want to complement this beginner’s guide with other, more reference-typed books, such as the LaTeX Companion (I don’t know if the books are available separately), as well as some free (often rather shorter) tutorials and eBooks:
  • Getting to Grips with LaTeX. A personal favorite short beginner’s tutorial.
  • The LaTeX WikiBook. A nice quick online reference.
  • LaTeX and Friends. This is truly a very comprehensive up-to-date eBook for reference purposes (but it does not have complete examples as Kottwitz’s book does). I understand that the author is still updating it from time to time.