Featured Post

We've moved to tex.my!

It’s been great writing on Blogger.com, but we’ve decided to move to a new platform, thanks to some valuable help from a great, great friend...

Saturday, July 16, 2011

Printing Beamer Slides

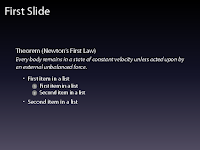
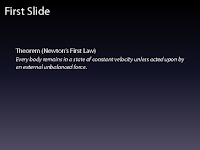
Every now and then I’d go wild with \pause and \item<+-> in my Beamer presentations, to present information piecewise. (I’m aware that some people disapproves this.) (By the way, the Manhattan theme is a Keynote lookalike.)

\documentclass{beamer}
\usetheme{Manhattan}

\begin{document}
\begin{frame}
\frametitle{First Slide}

\begin{theorem}[Newton's First Law]
Every body remains in a state of constant velocity unless acted upon by an external unbalanced force.
\end{theorem}
\pause
\begin{itemize}
\item<+-> First item in a list
\begin{enumerate}
\item<+-> First item in a list
\item<+-> Second item in a list
\end{enumerate}
\item<+-> Second item in a list
\end{itemize}
\end{frame}
...
\end{document}
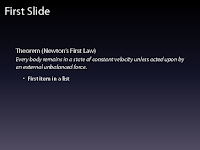
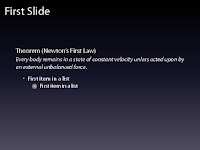
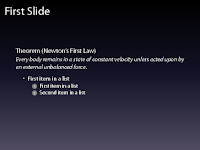
For archival and distribution purposes, I usually invoke

\documentclass[trans]{beamer}

to get a PDF file in which all the overlays are “condensed” to their respective single slides.
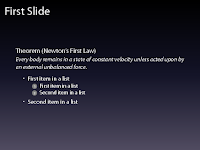


When it comes to printing the slides for my own reference, though, I often prefer to have the presentations 4-up on an A4 sheet. In addition, the Manhattan themed presentation isn’t really printer-friendly. So I’d instruct Beamer to only use the Manhattan theme in beamer and trans modes; and that it should use some mostly-white theme as well, as placing the slides 4-up on an A4 paper in handout mode (code lifted from the Beamer manual).

\documentclass{beamer}
% \documentclass[handout]{beamer}
% \documentclass[trans]{beamer}


\mode<beamer|trans>{
\usetheme{Manhattan}
}

\mode<handout>{
\usetheme{default}
\usepackage{pgfpages,pgf}
\pgfpagesuselayout{4 on 1}[a4paper, landscape, border shrink=5mm]
\pgfpageslogicalpageoptions{1}{border code=\pgfstroke}
\pgfpageslogicalpageoptions{2}{border code=\pgfstroke}
\pgfpageslogicalpageoptions{3}{border code=\pgfstroke}
\pgfpageslogicalpageoptions{4}{border code=\pgfstroke}
}
...

Running pdflatex while activating the handout mode then gives me this output:
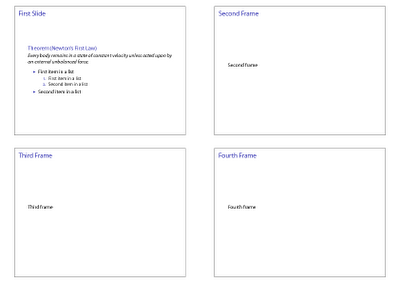


Just remember to process your file twice every time you change the mode, so that all hyperlinks and bookmarks are updated properly.

Tuesday, July 12, 2011

DIA + Lyx

Before I discover DIA, I used Microsoft Visio for schematic drawing to be included into my documents. The schematic drawn has to be exported into a graphic file, in which I prefer .png format. Then only it can be included in .tex document as a graphic.

Then I found DIA. You can search the web for more info on the software itself. In short, it is an open source software Lyx as well. What I found to be helpful is that, DIA has an extension to convert .dia files, where you save the schematic drawing, into graphic files in the format of .png which can be called directly by Lyx.

What I have to do is, draw whatever schematic that I want, save it in .dia format. Then in Lyx, insert the graphic as usual. At the graphic file name field, insert the .dia file name. Lyx will treat that as the graphic file where you can resize etc. similar to any graphic files included using the method. 

Another setting to be done is that to let Lyx know where to fine the DIA extension to convert .dia file to .png file so that Lyx can call it upon generating final document. The setting can be found under menu Tools > Preferences and under File Handling > Converters tab. Under From format pulldown menu, search for DIA and under To format pulldown menu, search for PNG. In Converter field, insert this
dia -e $$o -t png $$i
and click Add button. That is it. Now you can use .dia file directly to include graphic into you document. Happy trying. See you soon.

Sunday, July 10, 2011

Unexplained error

I faced this kind of error before. What I mean by unexplained is that the location of error shown by Lyx does not contain any error. Sometime it is just one word without any LaTeX command at the location. By the way, I should mention for the benefit of newcomer, Lyx will highlight the supposedly error location. In this case of error, the highlight is at random location and you can explain what is the actual error. The unexplained error usually occurs, at least I experienced it, once I include a citation. I use BibTeX to generate reference list. The .bib file is linked to the Lyx file and once a citation is included, BibTeX will run the process of creating the list. Error will occur if the bib database contains error, usually it has an illegal character. You know, citation info can be exported directly from publisher's webpage or even from Google Scholar page. The auto export function is the culprit of the error. Some of the article title or even the name of authors can have illegal characters. Most of it is characters like % and &, which is the command character in LaTeX. So, the errors can be overcomed by making sure that the bib database doesn't have any of this illegal characters. That will it for now. See you soon!
Published with Blogger-droid v1.7.2

Saturday, July 2, 2011

Getting started with Lyx

Well, to get started with Lyx is pretty straight forward. Of course you have to install the software, which you can download from lyx.org. The installation is again, straight forward. No much hassle. Just say yes to all the question. Unless you want to tweak some features.
Basically it is just like using word processor (Microsoft of OpenOffice or LibreOffice). Create a new file, then you are almost ready to go. If you are using source code editor, first command you put in is
\documentclass[]{}
Well, you have to do the same with Lyx. The function can be found in menu Document > Settings. Here basically you can do all the setting necessary. You can select the class file from dropdown menu under Document Class tab. By default, there are few classes already installed in Lyx. That includes article, IEEEtran, elsarticle, beamer (if I not mistaken), book etc. If the class is not installed, it will be marked as Unavailable.
To make a class available in Lyx dropdown menu, you have to create the layout file. It will link the class to the ui of Lyx so that it can be shown. Creating a layout file is very easy. Here is the most basic layout file that can work with any class file.
#% Do not delete the line below; configure depends on this
# \DeclareLaTeXClass[classfilename]{name-to-appear-in-dropdown-menu}
input stdclass.inc
With that the class file can already work provided that it is saved with the same file name as the class file name, i.e. the class file is myclass.cls, therefore the layout file should be named, myclass.layout. As simple as that.
To include the layout in the dropdown list, you have to save the layout file in layouts folder in Lyx program folder and reconfigure Lyx through menu Tools > Reconfigure and close and reopen Lyx afterwards. Or, if you don't want it listed, you can just use local layout option (there is a local layout button next to the dropdown menu). However, using this option, you must have the layout file in the same folder as your document file.
If you have zero knowledge of LaTeX, don't worry. Once you have selected the document class, you can start entering document content. On top left corner, just below File menu, there is a dropdown menu with option Standard as default. This is called style picker. Standard is for normal text. Here you can select title, author, section, chapter, section*, theorem etc. depending on what is available in class and defined in layout. To change you text into certain style, you don't have to select text, just simply put the cursor anywhere in the text line, and change the style. Now you can start typing the content.
I think that should be it for now. Next time, we will see how to add more than text in Lyx. Until then, happy LaTeXing.